This is the third blog in series on using the humble corner rounder to do more than trim the edges of your pictures. Be sure to look at the first three blogs for both techniques and layout ideas.
Part 1: Using the Corner Rounder for Simple Borders
Part 2: Using the Rounded Square for Fabulous Layouts
Part 3: Make a Mandala Burst Layout with Rounded Squares
First, I want to give credit where it is due. These ideas were not developed by me but were kindly and publicly shared by their creators/designers. See below for those credits AND links to original sources. My contribution was to gather these corner rounder ideas together as a group.
In the last blog, you learned how to make a beautiful Madala Burst layout with Rounded Squares (a square rounded on two corners). See below.

Today, I’ll share another wonderful design that you can make using Rounded Squares. This is a “oldie-but-a-goodie” shared via a Creative Memories video. Materials note: For ALL the Corner Rounder Roundup projects, you can use:
- Any corner rounder. You don’t have to have a two-way corner rounder that also cuts indents on corners.
- Either two-sided or one-sided printed papers.
- Printed papers or thin cardstock except as noted.
- SCRAPS! Use them up!
CREATIVE MEMORIES CORNER ROUNDER FLOWERS


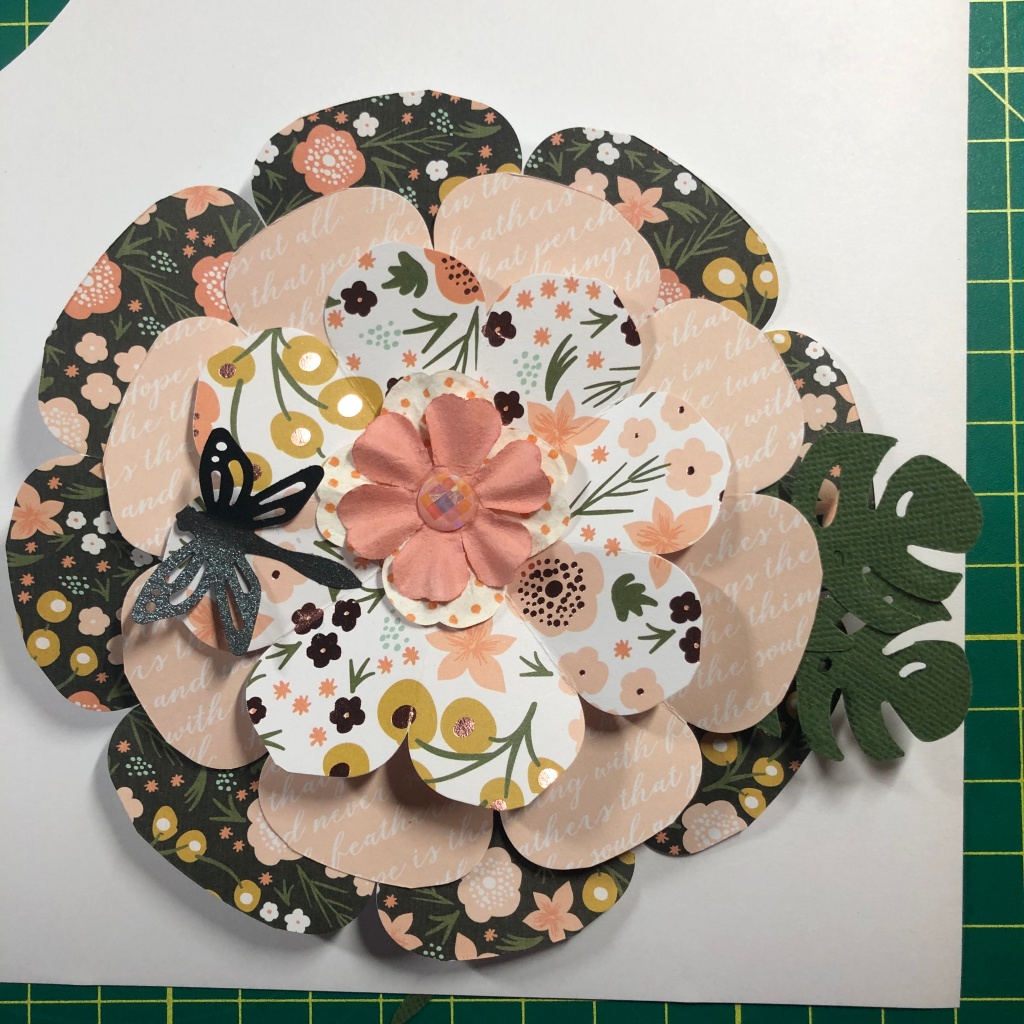
- Pick your papers carefully. For your middle layer, consider using a light print or tone-on-tone paper. Three busy prints can make the flower a bit “confusing.”
- You CAN use very lightweight cardstock but you must be able to fold it and unfold it without the surface showing cracks or permanent creases.
Materials: You will need the following:
- Three circles of paper of various sizes. Note that your finished flower will be the size of your largest circle so plan accordingly. Also, if your circle is very small (e.g., less than 2″ or 2.5″) you will have trouble using the corner rounder to cut the petals.
- Embellishments such as gems, insect punches, tiny flowers, etc. for the center and leaves for underneath, as desired.
- Foam squares (optional)
STEPS
- Be sure to watch the video first.
- As shown in the video, for each circle, you will fold it in half and punch the two folded corners. Then you repeat this four times, folding the flower in half and rotating so you end up with 8 “petals” around the outside of your circle. Unfold but do not try to completely flatten the paper.
- Stack the layers, with the largest on the bottom. Adhere each with either adhesive or foam squares in the CENTER of the piece, leaving the edges free.
- Adjust the “petals” as desired, slightly folding some upward to give your flower depth.
- Add embellishments (see picture below). Your flower needs a “center”…how about a blingy crystal or pearl stick-on, a circle of a matching paper, a lovely bee or butterfly, or other embellishment? Also, consider adding a leaf or two under the bottom petals on one side to break the circle and provide more visual interest.

Some ideas:
- Want a two-page spread? Make an extra half flower and bee and use them to accent in the opposite corner.
LAST NOTES AND INFO…
- If you make one of these layouts, please take a picture and share it below!
- Many thanks to H. Northcott and T. Perper for sharing their examples above.
- If you need supplies or tools from Creative Memories, I would be delighted to assist. You can order easily through my link: https://www.creativememories.com/user/MarshaSC .
- Want to attend my next virtual crop? They are FREE! Be sure to follow my Facebook page (Marsha’s Scrappin’ Circle) or send an email to me to be added to the email list so you get early notice!
- Need help with an order or more info about a crop? Contact me at marshamatyas@gmail.com.
