Corner Rounder Roundup Part 2: Using the Rounded Square for Fabulous Layouts!

This is the second of a blog series on using the humble corner rounder to do more than trim the edges of your pictures. In March 2021, Scrappin’ Circle friends from the U.S. and Canada joined me for a Zoom crop where we focused on using a corner rounder punch (CRP) and paper scraps (bash your scraps!) to create layouts, borders, and embellishments. I received lots of requests to share what we did, so I’m writing several blogs with directions so you can make them, too!

First, I want to give credit where it is due. These ideas were not developed by me but were kindly and publicly shared by their creators/designers. See below for those credits AND links to original sources. I encourage you to “follow” these amazing designers at their websites or Facebook groups. My contribution was to gather these corner rounder ideas together as a group.

In the last blog, you learned how to make a Rounded Square (a square rounded on two corners). Today, I’ll share a wonderful layout that you can make using Rounded Squares.

Materials note:  For ALL the Corner Rounder Roundup projects, you can use:

  • Any corner rounder. You don’t have to have a two-way corner rounder that also cuts indents on corners.
  • Either two-sided or one-sided printed papers.

MEGGAN JACKS’ CORNER ROUNDER LAYOUT

Meggan Jacks is a wonderful scrapbooking designer and trainer. She graciously shares some free designs through her Facebook page and website. If you love what you see, she offers a membership in her “insiders” group where you can get PDFs of weekly designs, etc. Click here for details.

She created a beautiful layout and shared her how-to’s on Facebook). Note that you need to scroll through the pictures to see the directions and they are in reverse order…but you will get the idea! If you are not on Facebook, I’ll share some directions below.

You will need the following:

  • 1 sheet of 12” x 12” background paper A
  • Twelve 2” x 2” squares of paper
    • Six with a distinct pattern (e.g., palm fronds on Jacks example above). Note that Jacks points out you can cut all six from a mat pack card, if desired.
    • Three with a more subtle pattern or plain (e.g., pink tone-on-tone on Jacks example above)
    • Two with a darker or different print or plain (e.g., navy print on Jacks example above)
  • Four 12” x ½” framing strips OR additional sheet of 12” x 12” background paper B (navy in Jacks example above)

STEPS

  1. Trim ½” off the side and top edges of your background paper A. Resulting page is 11.5” square.
  2. Create frame one of two ways. 1) Adhere background paper A to 12” x 12” sheet of background paper B OR 2) Adhere the four strips of background paper B to the back of background paper A so that ¼” shows on each side on the front. Your whole page should be 12” x 12” square.
  3. Layout your twelve 2” x 2” squares as shown in the samples above. Do not adhere to the paper. Make sure you like the direction of the patterns.
  4. Lift your squares one at a time and use the corner rounder on the TOP LEFT and BOTTOM RIGHT corners only (each resulting Rounded Square should have two round and two square corners).
  5. Put each Rounded Square back on the layout in the correct position after you punch them. Note that the rounded edges should be on the TOP LEFT and BOTTOM RIGHT corners of each Rounded Square when you put them in the layout.
  6. Adhere the Rounded Squares, starting in the corner and leaving a scant 1/8” between the Rounded Square and the side of background paper A. Pay attention to the pattern of colors so they are similar to the samples above.
  7. Time to embellish some of the Rounded Squares! You can use bits of border punches, layered embellishments, stickers, flowers, or other embellishments. Be sure to check out Meggan Jacks’ ideas on Facebook.
  8. If you like the three-photo layout on the examples, cut three 5″x4″ mats or three 4″x4″ mats.
  9. Add embellishments or title as desired.

Some ideas:

  • This would make a great title page for an engagement or anniversary (pics of the bride and groom on the bottom and top corners and a pretty title in the middle) or a vacation (great pics of the travelers on the corners and title in the middle).
  • Some of the Rounded Square can be photos! Consider face shots in some of the spots.
  • Trim your photos as Rounded Rectangles or Squares to add to the mats!
  • Want a two-page spread? Consider moving the bottom right cluster of Rounded Squares to the opposite page.

LAST NOTES AND INFO…

Be safe, be happy, and…be scrappy!

Marsha

Time for National Scrapbook Day!

May 1 is National Scrapbook Day, a day to celebrate all we do to preserve our memories through photos, video, other media, journaling and careful preservation of media and memorabilia. Creative Memories was instrumental in establishing NSD in 1996.

Did you know scrapbooking dates back to the 15th century? And that, in the 18th and 19th century, scrapbooking (then called “friendship albums”) encouraged young women to write about and annotate their lives. You can read more about the history of scrapbooking on Wikipedia, although the article does not describe the dramatic increase in 2020-2021 in scrapbooking due to social distancing during the pandemic.

I attended the Creative Memories (CM) National Scrapbook Day 2021 preview webinar last week. With 1,000+ CM Advisors on the call, it was quite a crowd! The theme this year is “Let the Shenanigans Begin!”

With a single Project Recipe Kit, you will be able to make BOTH of the layouts below!

What else will be available? In addition to the beautiful papers and embellishments used in the layouts above, you can order additional cardstock, reversible laser cuts, a new shamrock recipe template, a beautiful mint green shamrock embossed album cover, foil embellishments, and digital versions of the materials. And, if you buy a bundle, you get a free booklet of great layouts!

Let’s celebrate!

All the great materials above go on sale March 1; you can order through my link: https://www.creativememories.com/user/MarshaSC .

I will be hosting an NSD Zoom crop (date TBA) to show how to use the materials for the NSD layouts and more. Be sure to follow my Facebook page (Marsha’s Scrappin’ Circle) or send an email to me to be added to the email list so you get early notice!

As always, I would welcome your order through my CM page. Contact me at marshamatyas@gmail.com for more info.

Be safe, be happy, and…be scrappy!

Marsha

Virtual Crops? Try it! You’ll Like It!

Are you tired of social distancing? Do you miss getting together with friends to work on your scrapbook, make some cards, or do other crafty projects? Or perhaps you have always worked alone on your craft projects…it’s too much hassle to pack everything up to go to an evening, day or even weekend event. For all the above, I highly recommend trying a “virtual crop” or “virtual crafting session.”

What is a Virtual Crop?

Due to the pandemic and the need for social distancing, you have probably become familiar with virtual (online) meetings for business meetings, doctors’ appointments, religious services, visiting family and friends, and even attending major events such as weddings. It’s a simple principle: You receive an email that includes a link (hyperlink) that you click to join the meeting. Your computer might have to install a little program as the meeting opens but soon you are connected and face-to-face with your colleagues, family, doctor, etc. Virtual crops use the same technology but instead of your doctor, you will see live video of other scrapbookers ready to welcome you to the crop!

Sharing what we learned at a small crop.

Hints

  • If your computer pops up a box that asks whether you want to test your microphone and audio, do it. This assures that you will be able to hear and speak during the virtual crop.
  • You may receive a message that you are “waiting for the host” to let you into the “room.” This is normal…it allows the host to make sure that non-crafters don’t join the virtual meeting.
  • If the host doesn’t admit you to the room in a few minutes, feel free to email or text her/him to say that you are in the waiting room.
  • If you enter the virtual crop and can’t hear or see people, “leave” the meeting and try entering again. Remember that this software is handling many thousands of people at the same time!

What happens next?

Once you have joined the virtual meeting, be sure to turn on your microphone and, if possible, your camera. Everyone likes to see everyone else…don’t worry about how you look. Half the group is probably in sweat pants or leggings and you may see some PJ’s in the morning! Next, you introduce yourself (or the host of the crop introduces you)…very informal!

“Hi! I’m Marsha from Maryland. I’ve been scrapbooking for about a year. This is the first time I’ve done one of these virtual crops so let me know what I need to do.”

Feel free to greet friends you know.

Is there an agenda?

The host often sets an agenda. Listed below are common agenda items you might find at a virtual crop. Note that all of these are OPTIONAL; if you want to simply work on your crafts or just watch, that is perfectly fine!

  • “How-to”: The host demonstrates how to create a page layout, make a border or embellishment, use a new tool, etc.
  • Showcase new materials or tools: If the host is, for example, a Creative Memories consultant, she/he may show pictures, videos, or demonstrate new papers, embellishments, punches, etc.
  • Stretch break: You may be encouraged to get up, stretch, and take a walk.
  • Discussion topic: The host may lead a discussion on setting goals for the year, what you put on the front and back pages of your albums, how you plan your albums (e.g., annual, vacations, major events, birthdays, etc.). You may be encouraged to “show and tell” examples from your scrapbooks.
  • Drawings and games: There often is a tally sheet or bingo sheet where you mark off things you accomplished at the crop. Accomplishments can earn you prizes (paper, embellishments, etc.).

Do you have to be there the whole time?

For a short crop (1-3 hours), you might be expected to attend the whole thing. But for longer crops (all day, 12 hour, etc.), hosts will expect you to come and go as you wish. Some crafters watch the schedule and show up for the demonstrations they are interested in and then leave. ALL of that is acceptable unless the description of the event says attendees are expected to attend for the whole event. That is very rare.

What happens if I get disconnected?

It happens. Or, more often, everything slows down or locks up on your virtual call. Simply “leave” the meeting or reboot your computer and re-enter the meeting the same way you did the first time. If the host’s computer locks up, give him/her a few minutes to reboot and then try to come into the call again. If there is continued trouble, be sure to check your email or text for communication from the host.

Can I get anything done?

YES! You can work throughout the crop on your own work. You also can say, “Hey, what do you think…is this better with the blue paper or the red paper” while you hold up your work in front of your camera. You can ask, “Has anyone ever done X or tried to use Y or know how to get glue off an old photo?” And you will get lots of ideas and answers. And you will make new friends. Here are comments from an old friend who attended my virtual crops last year and from a new friend I made through the virtual crops last year.

I have been scrapbooking for over 20 years. I love going to small crops with close friends and large crops with people who become my friends!  When Covid-19 hit, all the crops that I had planned to participate in were canceled. When Marsha said she was going to do crops on Zoom I thought, “How will that happen?”  I wasn’t sure how they would take place; would we be able to communicate with each other, would we be able to see each other’s work, isn’t it weird to have all these people looking at you, etc.  My first Zoom crop was sooooo exciting!  I was able to get several pages done and it was so neat meeting people from all across the USA!  I even got to see friends that I would usually crop with! We talked with one another, asked questions, got suggestions for layouts, and there were times when it was quiet – it wasn’t weird at all!  I enjoy learning new layouts and Marsha is very patient when it comes to teaching them!  I have completed several albums during the Zoom crops, and I have been able to organize my photos which makes my scrapbooking so much easier.  If you love to scrapbook, you need to try a Zoom crop!!

Deb N., Maryland

Marsha’s Virtual Crops literally saved me during the pandemic. I know that statement sounds extreme, however, I believe it is true. As someone who at times struggles with anxiety, having our Virtual Crops gave me a focus, a valuable connection with others and a feeling of accomplishment. Most importantly it simply gave me something that brightened my week – I look forward to our Saturdays. Now I’m off to prep for our next crop and there is a smile on my face!”

Terri P., Maryland

What is the cost?

Except for some training or special crops where you receive a lot of training or materials, virtual crops are free. My crops are free.

How do I find a virtual crop?

Of course, you are always invited to attend my crops! These are always posted on my Facebook page and in the Facebook feed at the right side of this page. Also, sign up for my biweekly email update for both crop announcements and info on new Creative Memories resources, and other vendor events. Email me and ask for the Scrappin’ Circle Newsletter.  

You also can search for events at the Creative Memories site. You can search by date, zip code, or state. Be sure to click “virtual events” under the search box. Remember that, for virtual events, the LOCATION does not matter…so use the “search by date” box.

What are you doing at the Jan 16 crop?

  • A quick fold over layout that would be great as an album title page
  • A big circle page with “how-to” on creating a woven pattern circle
  • A Noreen Smith layout that can be done both simply and with greater embellishment
  • A discussion of goal-setting for 2021
  • And a stretch break and prize drawing, of course.

Email me for the Zoom link at marshamatyas@gmail.com !!

As always, I would welcome your order through my CM page. Contact me at marshamatyas@gmail.com for more info.

Be safe, be happy, and…be scrappy!

Marsha

Hearts Afire!

Wow…everyone is making heart layouts! This “heart beat” started in February (no surprise there) but the creativity just keeps coming! And the good news is that they are really SIMPLE. Did you ever play with tangrams? You can make LOTS of shapes with triangles and squares (as we have seen in my previous posts). Add circles and you get an amazing array of options! Today…let’s make HEARTS!

Take a look at some of the wonderful things you can do with this hearts layouts!


Materials: All you need is one 12 x 12 sheet of card stock and one 12 x 12 sheet of double-sided paper. If you would like to make the two-page layout above, have two sheets of card stock ready. For the first time you make this layout, it is best to have a print that is NOT one directional (e.g., no stripes, arrows or columns all in the same direction). A paper cutter and circle cutter is really helpful for this page but you could certainly do it with a ruler, scissors, and a can or jar.

Pam Giganti created a WONDERFUL video showing how to make one of the large heart layouts. Watch and learn! Pam makes it really easy!

I wanted to use the heart as a cover page for the part of my album describing a Disney visit in the fall. But the space in the middle didn’t fit well with the 5 x 7 picture that I had printed for the page. SO…I made a page using larger circles (nearly 6 inches) and trimmed the picture to be the point of the heart. I still have a little adjustment to do but what do you think? This layout is really adaptable!

I also wanted to make the little heart border that Pam describes in the video. What could be more perfect than my pages for the Disney princess parade! I happened to have a great purchased embellishment of the castle complete with a tiny Tinkerbell. I think the heart borders worked well…even though I clearly am not a great freehand heart-cutter. Good thing I’m not a cardiac surgeon!

This slideshow requires JavaScript.

Have you made some heart layouts? Share them below or on my Facebook page!

Disclosure: I’m using the second half of my blogs to share product info in order to reach the most people without asking non-Facebookers to join Facebook!  I am a Creative Memories Advisor and, should you place an order through my page, I earn a percentage of the sale. However, I only recommend the products that I think are really wonderful and would and do use myself.

NEW RELEASES TODAY!

fun in the sun collection

Fun in the Sun!

Designer paper has patterns with “striped beach towels and toys, sunglasses, starfish, seashells and water waves in a palette of hot pink, vivid violet, aqua blue, periwinkle, tangerine and banana yellow. It’s perfect for photos of the sweltering days by the cool refreshing water, backyard barbecues and more.” Check out the fabulous purple album cover with splashes of summer colors along with mat pack, stickers, and embellishments. What a great collection! Check out the whole bundle here.

A Festive Fourth of July!

Inspired by all-American barbecues, Fourth of July family get-togethers and pride for the USA, this collection features designer scrapbook paper, stickers, a beautiful red album embellished with fireworks, and new firecracker punch (below). Patterns feature “stars and stripes, firecrackers, fruit and red, white and blue popsicles in a palette of strawberry red, blueberry and denim blue, navy and tan. You’ll love it for your photos of festive celebrations, the Fourth of July, saluting military personnel and more.” Check it out here.

love each other

It will be back! I’m so very sorry…CM released a Love Each Other Theme pack that was gone so fast I didn’t even get one! BUT it will be back later in the summer and I will post ASAP when it does!

Thinking about becoming an Advisor?

There is a new 3 step program to give you more rewards as a new CM Advisor. I would be delighted to serve as your upline Advisor! Drop me an email, give me a call, or text me…I would be happy to give you more info.

Virtual Events on the Horizon!

Creative Memories is hosting additional Virtual Crops in the coming months: June 12-13, July 10-11, and August 14-15. For more info, follow the CM Facebook page at https://www.facebook.com/creativememories/ 

As always, I would welcome your order through my CM page. If you order through my page in June, you can get a shipping rebate up to $20. Contact me at  for more info. 

Be safe, be happy, and…be scrappy!

Marsha

The Best and Worst…

It was the best of times, it was the worst of times, it was the age of wisdom, it was the age of foolishness, it was the epoch of belief, it was the epoch of incredulity, it was the season of Light, it was the season of Darkness, it was the spring of hope, it was the winter of despair, we had everything before us, we had nothing before us… (Charles Dickens, A Tale of Two Cities, 1859)

You might relate a bit more to Dickens’ opening lines today than on most warm spring days. We are living through a time of worsts and bests, light and darkness, and despair and hope. I find myself swinging back and forth on a pendulum…some days cherishing my family being at home all day and getting to have lunch with my husband each day (something we have never done during the work week in 35+ years of marriage)! But part of me wants everyone to get out so I can clean my house and clean out my basement. And, yes, go out to eat…the cover photo was our last “night out” before social distancing kicked in…Chinese food and a Duck Donut! I really miss vacation, too! Cancelling our much-needed fall vacation to SC and trip to IN to visit relatives was so painful, but NOTHING compared to what so many families are dealing with in terms of finance and health. We pray every day for those who are sick but also those who take care of them, AND we pray for all who are keeping the wheels turning in our world to create and deliver food and other essentials. So every day, I’m counting my blessings: We are safe, healthy, well-fed (TOO well-fed), and financially OK. My husband and I can both do our work from home. I pray that the same is true for all of you!

Making Lemons…

lemon meringue pie

…into lemon meringue pie! I don’t like lemonade much, so I’ll make my lemons into a lovely pie! Have you used this unexpected window of time to take at least ONE step forward in preserving your memories? That could be sorting pictures, labeling groups of pictures with dates and locations, printing pictures, or even starting that album you keep meaning to get done. You don’t have to do it all at once, but even a bit of sorting can get you started. I start by sorting pictures into YEARS. If you have digital pictures, did you know that you can find out the date they were TAKEN (not the date you pulled them off your camera or phone and saved them. If you are using Windows, right click on a picture icon in your file folder, then click on the “Details” tag at the top of the menu box (see below). You will see a “date taken” date. For most pictures, that will be the date you took the picture. For older pics that have been duplicated several times, this may not be valid, but it really helps when you can’t remember if that was the 2017 or 2018 snowstorm picture!

photo details menu

How to get started? I have several blog posts below that can help…scroll down and see the titles. If you have specific questions, post a comment or ask on my Facebook page (https://www.facebook.com/MarshaScrap/). Also, check out the Creative Memories Everyday Photo Décor Kit below…you can take a single photo and make a beautiful display, complete with wooden stand, in 5 minutes!

What is new from Creative Memories?

I’m struggling to get info out on new products and resources these days…posting on Facebook AND creating email letters AND writing blog posts AND planning for virtual events is more than my schedule allows right now. So, I thought I’d share new product info as part of my blog to reach the most people without asking non-Facebookers to join Facebook! Full disclosure: I am a Creative Memories Advisor and, should you place an order through my page (listed below), I earn a percentage of the sale. However, I only recommend the products that I think are really wonderful and would and do use myself.

A Great Deal…Even without Steve Martin and John Candy!

Have you seen the new Planes, Trains, and Automobiles papers and embellishments? They are PERFECT for travel pictures (see slide show below)! And, for the next few days, you can order them as a bundle and get a FREE cover ($35+ value)! Click Planes, Trains and Automobiles collection for more details. Note…the cover will be included in the bundle as long as they have them…it is NOT a separate item. But, if you want this, do it SOON…these will not last long.

This slideshow requires JavaScript.

Mothers Day Specials!

CM rarely puts things on “sale” but for Mother’s Day, they put together some GREAT materials collections and then DISCOUNTED them! Check them out at https://www.creativememories.com/mothers-day-specials.html.

MothersDay_Flyer_0520_US

Here are some details:

  • Blend and Bloom bundle with beautiful spring colors – PAPER PACK, STICKERS, FLOWER EMBELLISHMENTS, FOAM SQUARES AND NEW DOT PEN.  All for $30
  • Remember Rainbow Rush…those amazing colors? This bundle has Rainbow Rush Bold Paper Pack and Layered Title Embellishments, plus a coordinating 8×8 Jade Album Cover and 8×8 White Refill Pages…all for $46.
  • Flourish bundle with COVER, FAST TO FAB PAGES, STICKERS, MAT PACK AND the Global Glow Recipe Template, clips and pen included! All for $69! ($86.50 value).
  • As noted above, the Everyday Photo Décor Kit includes all you need to create three photo décor cards, including pre-cut and pre-packaged die cut photo frames, additional decorative pieces and stickers, three double-sided 8×6 card bases and three wooden stands for displaying your finished masterpieces. You can either follow the super-easy instructions or mix and match the pieces to make your own. You’ll love this kit for sending photo greeting cards, giving as gifts or decorating your home or office with special photos – just create your photo card and slide it into the wooden base to display! Great gift for kids, moms, grandmothers, anyone! All for $7.50 (original $20!).

Have I used these materials…yes! Blend and Bloom, Rainbow Rush and Flourish papers and stickers are all in my albums…but I just ordered all of these except the Rainbow Rush bundle (I still have some RR materials!). And I ordered the full pack of Planes, Trains, and Automobiles. I am SET for vacay layouts!

And what does MY lemon pie look like? 

I finished one album, did a partial power layout for another and have completed a number of pages for it. Not as much as I would like and certainly not as much fun working alone, but here are some samples!

This slideshow requires JavaScript.

As always, if you are interested in materials, tools, or supplies from Creative Memories, feel free to contact me with questions and/or place an order through my page. 

Happy Scrapping Everyone! God bless!

Marsha

Fold-over layouts: Ten minutes to “Amazing!”

It’s been a LONG time since I’ve had time to write a new blog entry. I’ve been busy upgrading my scrapbooking equipment, writing proposals for a series of Friday/Saturday scraps, and learning new techniques to share. But I’m back…and in this entry, I’ll share a series of layouts you can do without cutting a single piece of paper. They are called ”fold-over” layouts and are both eye-popping and fast!

Every sheet of paper has two sides

The beauty of a fold-over layout is in its simplicity. For most, you only need TWO sheets of paper and NO cutting instruments (no scissors or paper cutter).

Here is a really easy one! All you need is one sheet of background paper (or even just your scrapbook page) and one sheet of two-sided paper (e.g., paper that has two different prints, one on each side). For this layout, I took one piece of purple card stock for my base (below left) and one sheet of patterned two-sided paper with a blue floral pattern on one side and purple dots on the other side (I’ll call it the “patterned paper” from now on).

I laid my patterned paper flower-side up and folded over about 3 inches to show a three-inch flap of the dotted side (above right and below left). I positioned the folded patterned paper on the purple card stock in the middle or a little to one side. To hold the flap down, I either use a little adhesive (below left) or a decorative border (below right).

Now I have a nice base to add pictures (with or without mats), stick-on title, and stick-on embellishments, as desired. From start to finish, this page took less than 10 minutes…and I didn’t need to cut a single piece of paper!

What else can I do with that layout?

There are SO many options for fold-over layouts. I recently attended the Mid-Atlantic Mega Crop (GREAT weekend!). One Advisor took a couple of packets of the Rainbow Rush papers from Creative Memories and made as many different fold-over layouts as she could with a pack of paper. Imagine your pictures of summer outings, birthdays, prom, or graduation on these pages. Pretty! Here (below) is a sampling of two-page layouts she came up with using the simple folding technique I showed you above. What do you think?

This slideshow requires JavaScript.

Show me more!

Will do! Here is another quick fold-over technique. For this one, you don’t even need two-sided paper! Select one background paper sheet (card stock or patterned paper) and one piece of patterned paper. Stack the patterned paper on top of the background paper/card stock. Now flip the stack over, and lay the pages upside down on a table. Pivot the BOTTOM piece 90 degrees so the corners of the bottom sheet stick out from middle of each side of the top sheet. Now fold each of those points over the background paper (see picture on left below). Use adhesive to secure them.

Flip the page over and smooth it down. Your page should look like the picture on the right above! Add photos, a title and a little embellishment. Voila! Another 10-minute page!

Diagonal fold-over 3

What else can I do with that layout?

At the Mid-Atlantic Mega Crop one advisor made three layouts using the same technique with the new Creative Memories Memoirs and Memories Collection (see below).  Sometimes she folded the patterned paper points UP so they are on the front of the page rather than the back. Here’s a sampling of what she came up with…what do you think?

This slideshow requires JavaScript.

Do I have to make 12 x 12 pages?

No! Try this technique with your 8×8 or 8×10 album. Or use it to make a special occasion card. Or create a special “mat” for a picture, tuck it into a simple frame and hang it or set it on an easel in the front hall. I promise you will get compliments!

Next time: A special fold-over 

Check out THIS picture. This is a fold-over page that ALSO takes about 10 minutes. It requires cutting your paper into squares and then triangles. A few folds and some adhesive and you are done. I’ll share the details next time.

IMG_3948~photo

Again, many thanks to the Mid-Atlantic Mega Crop team for all the great ideas! Also, a shout out to my scrapping buddy, Geri, who trekked to the crop with me and to new friends we met at the event.

And, as always, if you want to order some of the beautiful two-sided papers from Creative Memories, please feel free to use my link:

Keep on scrappin’!

Marsha

Using Templates

One of the nice things about scrapbookers is that they LOVE to share their work. And, consequently, they share templates for other scrapbookers to make a similar page! For example, this weekend is Easter and, if you celebrate this holiday, you might take some pictures of kids or grandkids on an Easter egg hunt, digging through an Easter basket, or wearing Easter outfits. Now you want to put those prints into an album…how can you lay them out so they will be pretty and make you think “Easter!” when you look at the page?

One great source of ideas is Pinterest.com. If you search “Easter scrapbook layouts,” you will find a wealth of ideas! Take a look!

Some layouts are rather complicated and, if you are just getting started, you may think, “How do I DO that page? Where do I start?”


This is where using a project template can be really helpful. Project templates break a page down into simpler pieces, helping you to create progressively more intricate and complicated pages.  Let’s look at an example:scrapbook template samplehttps://www.pinterest.com/pin/305681893452099138/

This layout by Kelly Holifield (Thanks, Kelly!) uses four different printed papers (green, yellow, pink and purple dotted paper) and one plain paper (the light purple). It displays three pictures in vertical format, and a few Easter stickers (eggs and bird).

Let’s break it down. To do a similar page, you need:

  • 4 strips of paper, about 1 ¼ or 1 ½ inches wide, and 12 inches long. If you are not sure how to measure and cut strips of scrapbooking paper, see my earlier blog.
  • They can be a mix of patterned and plain paper…whatever YOU like! They don’t all have to be different but I would try to have at least two different patterns or colors. So you need at least 2-3 sheets of 12 x 12 pattered or plain paper
  • 1 strip of paper about 11 inches long and 2 inches wide (the pink dotted rectangle in the sample)
  • 1 strip of paper about 10 inches long and 3.5 to 4 inches wide (the yellow dotted rectangle in the sample)
  • 1 circle of paper about 7-8 inches across (don’t have a circle cutter? See below) Want to make it a little more “Easter-eggy”? Cut it as a fat oval to be more egg-shaped.
  • A couple of stickers (optional)
  • A sheet of background paper or your scrapbook page
  • Adhesive to attach the paper and pictures to the page
  • An acid-free pen to write a title and journal

How do you assemble a page like this?

  • Always lay it out FIRST before you attach anything!
  • Work from the back to the front in laying out the pieces. In this case
    • Layout the four long strips in the back
    • Add the circle
    • Add the large (yellow dot) rectangle
    • Add the pink rectangle
    • Add the photos

This layout has some really good features for the beginner:

  • The first long strip, the yellow rectangle, pink rectangle and circle are all right justified, that is they touch the right hand border. This makes lining them up much easier.
  • Note that the circle touches both the right side and the top…easy layout!
  • It does not require tools other than those for basic measuring and cutting. The biggest challenge is cutting a circle. Use a bowl, lid, or bottle as a guide to draw a circle. There also are circle cutters that you can use for pictures or paper. I  use the Creative Memories Circle Custom Cutting System Patterns but there are lots of circle cutters (see Amazon search!)

Now LOOK at your layout.

  • Do you like it?
  • Do you want a little more or less space between the four strips?
  • Is there room for the title?
  • Is there room for the journaling (if not…consider cutting that circle across the middle and pulling the two halves apart a bit…the yellow dot rectangle will cover it!)
  • Do you like the order of the your pictures left to right?
  • Do you like the pictures tilted?

Once you have it the way you want it, you can use a No. 2 pencil to make a small dot where you want the four strips to be, where you want the yellow and pink rectangles to be, etc. Mark lightly so you can use your white eraser to remove the mark when you are done.

Remove each piece and then start using the adhesive. Again, start at the back and add layers. When you are done with the adhesive, you can add your title, journaling and stickers. Presto! You just made a great layout using a template. AND you can the idea over and over! This would be a great layout for Halloween, a birthday, Christmas, Thanksgiving, or any other event. For Spring, think pastels. For fall, think browns, tans, and rusts. For Winter, think blues and grays or reds and greens. For Summer, intense colors like deep pinks, blues, greens, reds, oranges, etc.

Many times you will see templates offered as a black and white drawing. For example look at this sample template from the Creative Memories blog :storytime_layout3_sketch-2https://blog.creativememories.com/2019/04/14/weekly-sketch-round-up-april-8-12/#more-40615 

What do you see?

  •  This appears to be a square layout, probably 12 x 12
  • Two 4 x 6 photos
  •  Two large squares of paper serving as background.
  • Some little paper strips for highlight.

But what are all those flowers, circles and asterisks? Am I supposed to cut out all of those?

No! You will often see clusters of flower shaped figures on a template. You may see stars or circles. These “clusters” tell you where the creator of the layout thought embellishments like stickers or sayings should be placed. WHAT those embellishments are is up to YOU! So, for Halloween, you might have pumpkins, apples, ghosts, etc. For a snowball fight, snowflakes. You get the idea. Don’t be thrown by the “flower cluster!”

Last week, Creative Memories hosted the first Worldwide Virtual Crop and sent out 12 different challenges (templates). People came up with HUNDREDS of ways to use them. Here is my take on Challenge #4. Note that I followed the general idea: 2 vertical pics, three circles across the middle, title and bottom border, and an embellishment on the top right corner. But I added another wide pic and moved the title up and didn’t have any embellishment on the upper left corner.

Important: Think about the number of pictures you want on a page and their orientation.

Trying to use a template where your pictures are VASTLY different from the orientation and size on the template makes it hard (but not impossible) to use the template. Remember that the point is sharing your pictures…not replicating a template!

Now it’s YOUR turn:

Challenge #12 is straightforward, uses three pictures, and 3-4 colors of paper. The embellishments are up to you! See the link below and scroll down for a couple of ideas (remembering that these were done by CM consultants so they put quite a bit into them!).

Challenge on!

https://blog.creativememories.com/2019/04/13/worldwide-virtual-crop-2019-challenge-12/

Comment and share your finished products!

Happy Scrapping!

Marsha


The Paper Trail – Where Does it Lead?

One of the tough parts about any hobby is figuring out what to do with your equipment and supplies. In this blog, I’ve been discussing how to scrap without buying a lot of supplies at once. But the supplies you HAVE to have, and in some quantities, are

  • Photos
  • Scrapbook pages
  • Scrapbook paper

Today, I’ll share some of my simple solutions for storing these items safely so you can easily access them for scrapbooking. Please note that I do not work for or receive any compensation from any of these companies. I’m simply sharing what I’ve found that works for me.

Photos

My absolute “go to” for photo storage are cardboard photo boxes. You can get them Pioneer Photo Storage Boxes, Holds Over 1,100 Photos Up To 4-6 Inches Photo Album-Sage Green
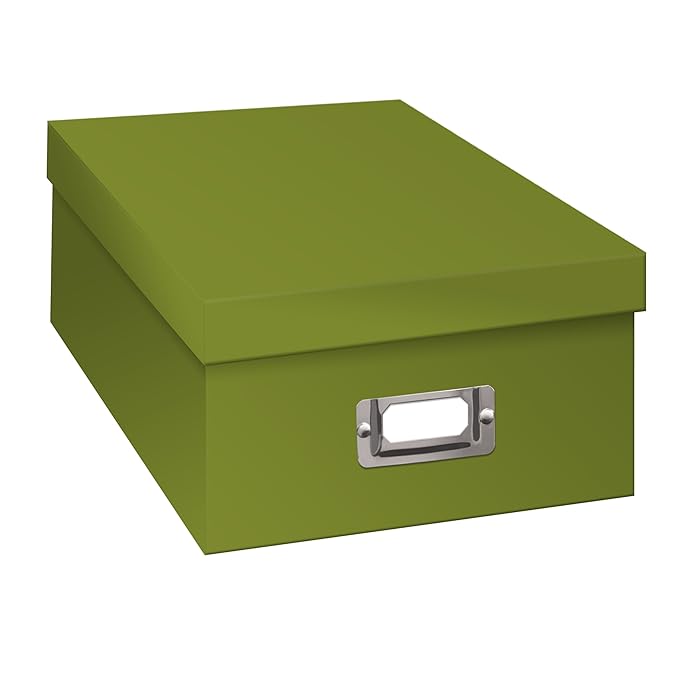
ANYWHERE: Michaels, Amazon, Target, Jo-Ann Fabrics, Container Store, Walmart, etc. Be sure they say “acid free.” You can get them in an array of colors and patterns so have fun with that! And the great part is you can use them for lots of things: photos, memorabilia, embellishments (stickers, etc.), supplies, etc. They stack nicely, have a labeling slot so you can re-label them easily. You can use them over and over each year or project. Or you can store pictures in them for long term storage. My only warning is to NEVER, EVER pay full price for these. They go on sale regularly. I usually get them at Michaels for $2 on sale; they are regularly $6-8 each. 

There are other photo organizing options such as plastic bins, but I am happy with my cardboard boxes. They are acid-free and protect my photos from light. I fill them with heavy pictures and have never had one break, crack, or buckle. And I figure the world has enough plastic already so I’ll use cardboard where I can.

Scrapbooking Paper and Pages

This is where storage options get a little tougher. If you make 12 x 12 albums, both items are “oversized” for nearly all office storage boxes (which are made for letter size or legal size), so you need a storage box or bin designed for scrapbooking. Fortunately, there are some reasonable options.

The shipping box: If you order materials from Creative Memories, Scrapbooking.com, Amazon, Echo Park or some other vendor and are lucky enough to receive a box that perfectly holds 12 x 12-inch items, keep it! It can serve you as an organizer or storage box for your materials when you are starting out. I would worry about long term storage. Nothing says the cardboard is acid-free so think of these as temporary housing.

IMG_2466

Clear plastic cases: OK, I said the world has enough plastic but these are NOT throwaways. In fact, I’ve never had one break in 20+ years of scrapbooking and I use the same ones over and over. These hold scrapbook pages, paper, embellishments, etc. without bending. Note that for some scrapbook pages you may need to turn them 90 degrees…the inside is not completely square.

I also use them to store memorabilia, journaling notes, etc. for each year until I have the album done.

Like photo boxes, I always buy them on sale, usually for $4 or less at Michaels.

classroom-construction-paper-storage\


Shelves for paper: These are very handy, but they are not my favorite. Unless you build a cover for them, they are open to dust and light. But they are very easy to use, come in an array of styles and prices, and you can usually stack them to increase your storage options.

Next steps?

When you collect more items than are easily handled by a couple of boxes and bins, here are some easy expansions…and some down-the-road dream products.

iris 6 drawer cartAn Iris 6-case scrapbook cart: One of my first storage purchases! I had a box for scrapbook pages, one each for patterned and plain papers, one for stickers/embellishments, one for 8.5 x 11 paper, and one for the project I was working on. And it was on wheels! I have rolled it all over the house and into many scrapbook weekend events. It is moderately sturdy but needs a little TLC since I fill those boxes with heavy paper. Standard price is about  $34 but you can often find them on sale at Target, Michaels, Walmart, etc.

The downside? Because the drawers are clear, the cart doesn’t protect paper from light damage. But I came up with a fix for that. I folded an inexpensive light-blocking curtain panel lengthwise and stitched along the fold (not a sewing person? Hot glue gun or Stitch Witchery would work fine). Then I used some Velcro strips to make my “wrap skirt” stick to the rim. Voila! A light protective wrap that easily opens when I want to use the drawers! Cost: About $10.

A lateral filing cabinet: I called a used office furniture shop to see if they had a used two-drawer lateral filing cabinet. If I bought it new? $400+ but used was $100. And it holds ALL my scrapbooking supplies and equipment. Hooray! Even better, it gave me more surface area to spread out when I’m scrapping! If you get one, be sure to measure the inside drawers to make sure they are 14 inches deep.

Down-the-Road Dream Products

Bookcase with adjustable shelves: Again, try a used office furniture store. New $129 but you may score one for half of that if buying used. Great for storing your albums, photo boxes, etc.

IMG_2319

ScrapRack: This was my Christmas wish a few years back that Santa Hubby made come true! It is a flip rack for your paper, embellishments, etc. I love, love, love it. But it DOES take space. I put it on top of my filing cabinet. And how do I protect that paper from light? I use the other light-blocking curtain panel left over from my cart wrap to drape over my paper when I’m not using it. You can find ScrapRacks at Totally Tiffany.

IMG_2317

I must also comment that the Totally Tiffany folks are wonderful at customer service. I lost a connector piece at one point. I called to ask how to order it and they sent me one for free. Years later one of the Spinders (notebook style binder clamps that hold the paper) pulled away from its Velcro backing. The company instantly replaced it.

And if you want to really get crazy, check out the WorkBox 3.0… It doesn’t suit my scrapbooking style but it’s a great idea!

work box


How do you store your paper? Please share!

Happy organizing!

Marsha

Bumper Crop!

I promised a little info on how to crop (trim) pictures for your scrapbook. Reminder – you don’t need to buy a lot of equipment. The “tools” we are using today are ones you have in your desk drawer (scissors, ruler, pen) along with your camera. There are TONS of great YouTube videos on taking great pictures and cropping them so I will refer you to some of those for great visuals and advice. Be sure to search for “cropping pictures for scrapbooks” or you will get a LOT about cropping pics on your computer or camera. With all that good advice out there, today I’ll give you a little overview, some good video links, and a few examples from my scrapbooks.

Scrappers crop a LOT of pictures. Even if you are using pocket pages to create your scrapbook, you will still need to crop some pictures. Cropping pictures not only gives you a better look for your scrapbook page, but it also teaches you to take better pictures. Soon you will find that you are “cropping” them in your mind as you frame the picture.

Take Better Pictures ⇒ Less Cropping…and Visa Versa!

If you are using a digital camera or phone, you have the advantage of being able to take a LOT of pictures and immediately see if you got the shots you wanted. I encourage you to do so. While you are focusing on the person or building that you are photographing, it’s easy to miss the unknown person who walked halfway into your shot and messed up the right-hand half of your picture. Or you thought you got the picture, but you accidentally hit the “panorama” or “video” button and didn’t get the shot you thought you did. Here are a few suggestions for getting the shot you meant to get and the great one you didn’t see until you saw the pictures later! Please note: This is not a full list of “best practices” for taking pictures!

Third Rule

Use the “rule of thirds” to frame your picture.

This is NOT an absolute rule but a good guideline to consider. Look at the grid above. If this is your picture, the rule of thirds breaks the picture into three columns and three rows. The rule suggests that the subject or focal point of your picture should fall on one of the lines, rather than in the center of the shot. And it also suggests that the intersection of the lines (the circles) are especially good points to line up your shot. Look at the lighthouse pic below…your eye goes to the lighthouse, but you also have the sense of the vastness of the ocean. Similarly, the hockey player lines up on the right hand line but his position in the photo and the turn of his head give you a sense of action in the photo. Remember, you can turn that grid for a vertical shot…same rules apply!

Want to know more about the rule of thirds? Watch these short videos:


Move it or lose it!

It’s really tempting to stand in one place and take a ton of pictures. But your camera is not doing what your eyes are doing…constantly focusing in and out on different aspects of the scene. Of course, your phone or camera will let you zoom in. But remember that zooming in with a digital camera can make the picture more “grainy,” especially if you later decide to edit or enlarge that picture. See the example below. Another tourist kindly took our picture at Disney Avatar…and they got EVERYTHING in the shot. I like the wide shot but also wanted the picture of the two of us…see what happens when I zoom in. The resolution of the picture decreases and the print will not be as focused and crisp. Fortunately, it was great lighting and an enlargement will probably be ok. And, yes, I really do look that dippy when I go to theme parks, but I have a great time!

This slideshow requires JavaScript.

When you take pictures, move around. If you take a long range shot to get the landscape, step forward to get one where you can see everyone’s face. And, by the way, you don’t need to get everyone’s shoes or even their belt in every shot. If you want a great pic of your friend or family member, think “portrait” and step in for another great shot, this time focusing on their wonderful faces!

Also, think “up, down, and sideways.” Don’t just take pics standing up. Take the same shot sitting or kneeling, focusing in on closer aspects or getting faces of kids from their level. And sideways? Turn that camera and take the pic vertically rather than all horizontal pictures. Remember…you don’t have to print them all or even keep them all. But take LOTS of pictures from different perspectives. Here are two REALLY good videos/pages to help you take better pictures that are already “cropped” and ready to go!


Learn what your camera will do.

Even the most basic camera or smartphone has an impressive toolbox to allow you to take and edit great pictures. Try out all the options on your camera, watch videos on how to use it, and PLAY with the camera and the resulting pictures. You probably have the option of turning on: a “rule of thirds” grid to help you line up shots and an HDR (High Dynamic Range) option that blends the best of close ups and landscape focusing in one picture. A “burst” option takes many pictures far faster than you can click the button and can help you capture that great shot of your little one or pet. There are MANY more options. You wouldn’t drive a car without knowing how to turn on the lights, windshield wipers, or radio, right? So make a cup of coffee and play with your camera so you know a bit more about how to use it.

In summary…

  • Take LOTS of pictures, using different techniques even on the same shot
  • Take some pics the rule of thirds, then move the camera slightly to take a couple centering the subject.
  • Flip the camera from horizontal to vertical and repeat the steps above.
  • Take some at eye level then change your level slightly…sit or kneel to get a different perspective. Get some vertical and horizontal shots.
  • Learn to use the features of your camera or smartphone
  • You will be glad to have choices when it’s time to print your pictures!

Cropping when you print the pictures

When it comes to printing your pictures, you have a wide range of choices! Online services range from professional photography sites to specialty shops such as Snapfish or Shutterfly to drug and department stores such as Walmart, CVS, or Costco. Which one you use depends on convenience and quality. If you are uploading pictures to these sites, you will have the option to crop and “enhance” your pictures before you print them. I encourage you to take time to do so. Many of the issues discussed above can also be fixed at this point. “Enhancement” tools can brighten a dark shot, fix an odd color tone, give you options for other color tones, and fix “red eyes.” Below is an example of a poor shot of a church in Charleston, SC. I took it from a horse-drawn buggy tour. Mostly we see the tour guide and the dark outline of the buggy. But using CVS cropping software, I got a relatively good shot of the street and church out of a not-so-good picture.

This slideshow requires JavaScript.

Slide4Also, consider whether you want to enlarge a few pictures. I usually print a few great pictures as 5” x 7’s” to use as divider pages (see examples below). If I have an amazing shot, I’ll even spring for an 8” x 10.”  When doing an enlargement, the online tools will usually tell you if the resolution (graininess) of the picture will support the enlargement. If not, you get the dreaded yellow triangle warning!

This slideshow requires JavaScript.

Cropping after you print the pictures

I still do a lot of cropping after I print the pictures. Sometimes you just don’t “see” it until you are laying out a page. I like to use a mix of 4” x 6” and 4” x 4” pics on a page as I showed in my earlier blog.  I’m pretty good at eyeballing the place to crop having cropped a few thousand pictures. But, the first time I cropped a picture, I was terrified I would mess up the picture! How do you get started in cropping?

First, use a couple of Post-It notes, or two pieces of plain paper to envision the cut.

When you like what you see, mark the lines and corners with a photo pencil or a ball point pen.

IMG_2447

Cut the photo with scissors or a paper cutter. If you use the ball point pen, cut just inside the mark. If you use a photo pencil, cut on the mark and then wipe off the pencil mark with a tissue.

IMG_2448

Voila! Your picture is cropped and ready to place on your scrapbook page!

Here are a two very nice videos on cropping your pictures:

When you are ready for an upgrade…

If you decide you like adding pictures to your scrapbook and would like to cut pictures more quickly and easily, here are some great tools that make cropping a breeze.

Personal Trimmer


Creative Memories Personal Trimmer

My first one lasted more than 10 years, with a lot of use during that time. I bought a replacement and it’s still my “go to” for cropping my pictures.


SureCut-Scrapbooking-Paper-Trimmer-12


Fiskars Sure Cut Paper Cutter

This is my favorite for cropping large pictures and for cutting paper.


12-inch-rotary-trimmer-creative-memories-656818-arriving-soon.jpg

Creative Memories 12-in Trimmer

This is a brand new product for CM and I haven’t had a chance to try it yet…they are JUST arriving in stock as I write this blog. Can’t wait to try it out!


As always, if you would like to order one of the Creative Memories products and do not already have a CM Advisor, I would be happy to help you. Please use this link to order from my page.

I hope this overview of cropping is helpful. If you have cropping hints, please share!

Happy scrapping!

Marsha

Taking a Trip? Write Journal Notes!

I create annual yearbooks and vacation yearbooks…and I am WAAAAY behind on both! I am currently working on a 2013 vacation book about a combined business/pleasure trip to England. We started in London and then, while I attended meetings in Bristol and Birmingham, my guys toured those cities plus everywhere they could reach on a tour bus (Stonehenge, Bath, Stratford-on-Avon, etc.).

We all had a great time but it was hard to consolidate pictures from multiple cameras. In fact, I was halfway through the album when we realized that there were TONS of pics my husband took on our waterproof camera (I didn’t even remember that we took that with us!). When I started working on the scrapbook, I realized that I was seeing the “data” from an informal experiment…more on that below

Take journaling notes during or right after vacation

I try to take some journaling notes on vacation. When the day is over and we are relaxing in our room, I write down the date and scribble notes on what we did that day, what we saw, funny things that happened, and if one of our group had a particularly big “WOW!” moment. Usually, it only takes 15 minutes and may only be a few sentences. If it was a very busy day with lots of events, it might be a bit more. It’s easiest if I look at the pics on the camera to remember where we went. The notes are SO helpful when it’s time to put scrapbook pages and journaling together!


So what was the unintentional experiment?

As I worked on the first part of the scrapbook (London), I referred to my notes…and the pages flew along. Then I got to the pictures where we were in Bristol. I had been in a meeting in Bristol, and the guys had been sightseeing and taking pictures…but they took no notes.

I had trouble knowing which pictures went with which location. I grouped the printed pics by date according to the digital file info, then laid them out on the table. I asked the guys to tell me about the pictures. They remembered many of the pictures and could identify what they were (“That was Bath.”). But there was no richness in their description, no funny stories, no excitement at what they saw. And there were many pics for which they could only say, “I think that was in X city, but I don’t remember anything about it,” or “One of these houses was where Shakespeare lived and one was his daughter’s house, but I’m not sure which is which.” I had waited too long to take notes on THEIR memories and now they have faded.

256px-Keep-calm-and-carry-on

Using what info I had, I started the Bristol pages. It was like climbing a steep hill to put those pages together. They are fine: nice pages, good layout, nice pictures. But to me, they feel like a birthday cake without frosting…yummy but a little “blah.”

The results of my unintentional experiment? 1) Journaling notes make it EASIER to create scrapbook pages of events; 2) You need input on journaling notes from those who took the pictures; 3) Don’t wait to get that input…either during the trip or right after!

How to avoid “blah” journaling

  • Try to take notes during your trip. You don’t need a fancy notebook!
    • Half-used spiral notebook from one of the kids from last school year
    • Paper pad or stack of paper in the suitcase
    • Note app on your smart phone (dictate! Ignore spelling!)
  • Save your notes with the pictures and other memorabilia. I use a photo box, scrapbook box, file folder, etc.
  • Sort digital pictures as soon as you can but don’t wait years! Put them into folders named by the day and location (“Aug 12-Bristol”).
  • Type notes into your word processing program and save them along with the pictures, if you prefer.

Don’t let time fly by…

Unfortunately, if you are scrapbooking older pictures, especially family pictures, there are people, locations, and events you may never identify. Recently, I have been scanning hundreds of printed pics from my parents’ many boxes of photos. Sadly, my parents have passed, so I am up uploading these to a shared online storage and asking aunts, uncles, cousins, etc. to help identify them. If you still have access to people who can identify older photos, take time to do so! Again, you are preserving family history for your children and future generations.

Does anyone have other ideas or suggestions about making journaling easier? Please share!

Happy Scrapping!
Marsha